免拆机TTL开启SBR-AC1750路由器telnet权限的方法
SBR-AC1750路由器想要刷第三方固件的话,就必须开启telnet权限,大多数时候是需要用TTL拆机来刷权限的,但这里给大家介绍一个免拆机TTL开启telnet权限的方法,虽然操作多一些,但结果是成功的,下面开始方法:
破解原厂固件:
原厂固件良心的一点是串口并没锁定可以直接进系统,
我们先把/www/目录下的文件备份出来分析,发现原厂固件使用的不是openwrt通用的web框架而是类似老毛子使用了C语言作为后端语言,无形中给破解造成了难度,那我们就反汇编整个主页面的cgi程序(setup.cgi)。
使用IDA载入cgi代码:
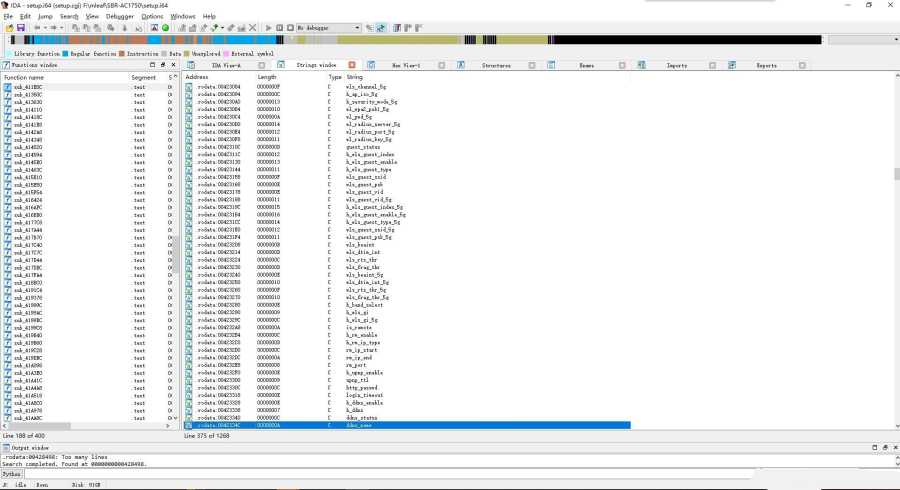
1:打开strings窗口(view->open subviews->strings)按ctrl+f搜索你想要的字符串,当然本人经过多次查找已经锁定直接搜telnet,当然这是我找到的最简单的SBR-AC1750的漏洞,当然还有好几个,比如磁盘挂载那里也有注入漏洞这里就不一一展开说明了。
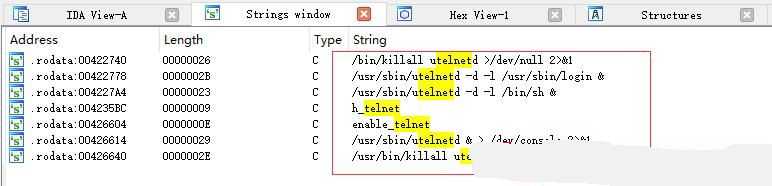
映入眼帘的是好几个关于telnet的字符,这么一看感觉是不是就可以开启telnet了呢注意看关键点(/usr/sbin/utelnetd -d -l /bin/sh &)这就是开启telnet的命令,但我们没法调用啊? 当然没法,我们得想办法使用注入命令让cgi自己调用此命令打开telnet。
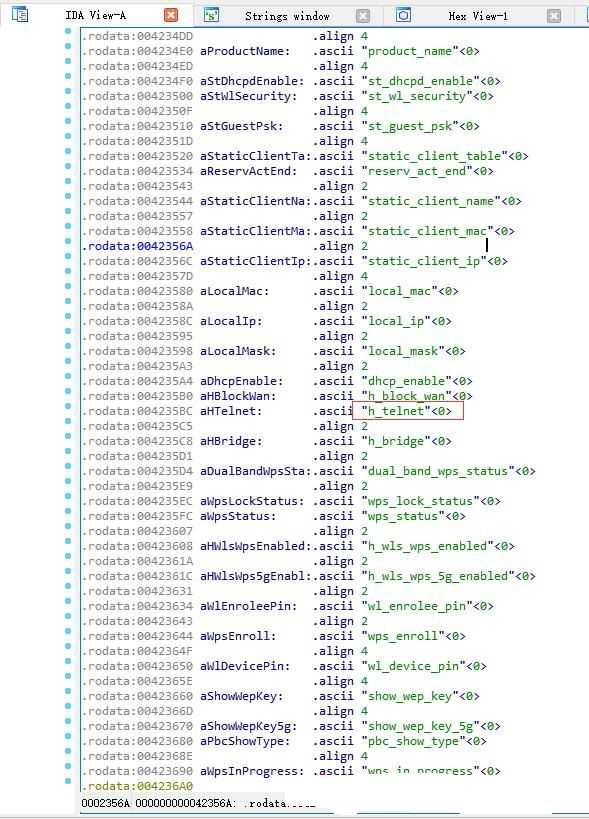
2:现在我们来看看我找到的最关键的字符(h_telnet),给人的感觉是不是就是http telnet呢,你猜对了。
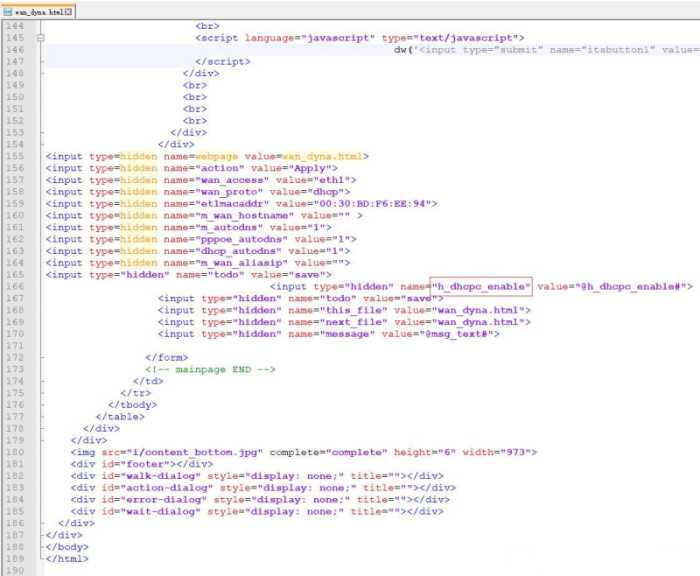
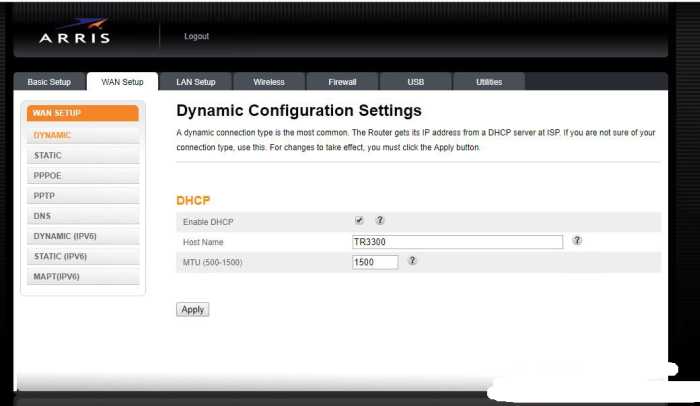
4:我们来看看一个web页面(wan_dyna.html),在166行h_dhcpc_enable是吧,该页面使用的是一个pos方法将表单提交给后台<form id="wan_form" name="wan_form" action="setup.cgi" method="post">
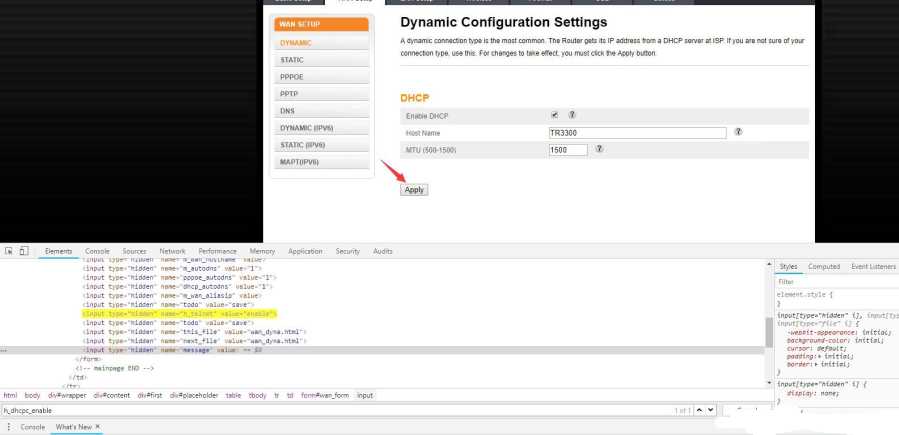
5:方法呼之欲出了,对你猜对了我们把h_dhcpc_enable替换成h_telnet不就可以了?接下来我们试试。。。。
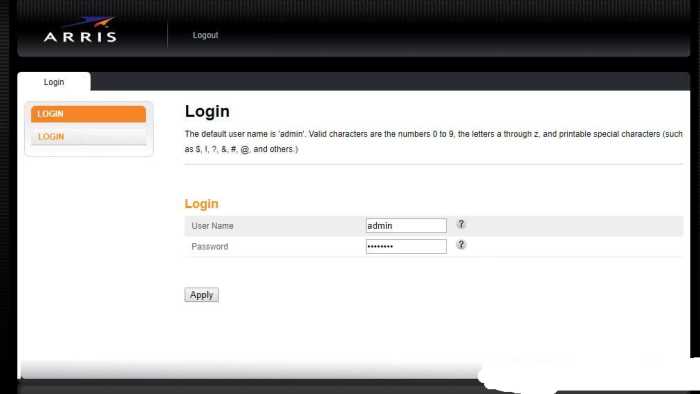
当然我们还是要先登陆默认用户名和密码为(admin, password)
a:进入wan_dyna.html页面
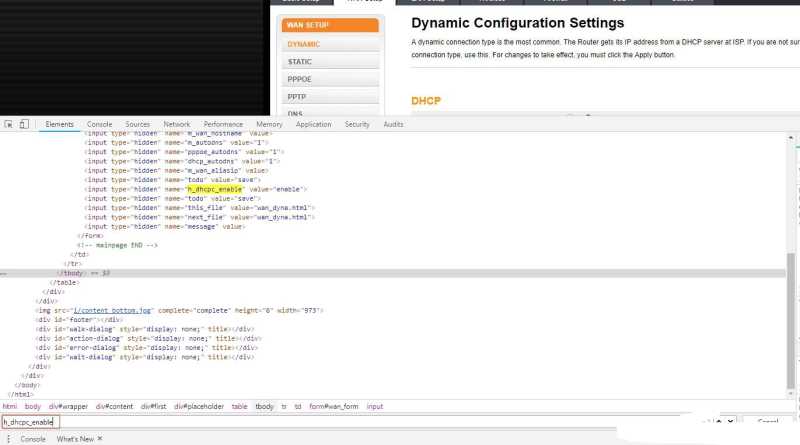
b:按F12进入调试模式,按ctrl+f进入搜索模式输入h_dhcpc_enable:
c:将页面中的h_dhcpc_enable改为h_telnet:

d:然后点击apply按钮,尽情的享受破解的快乐。
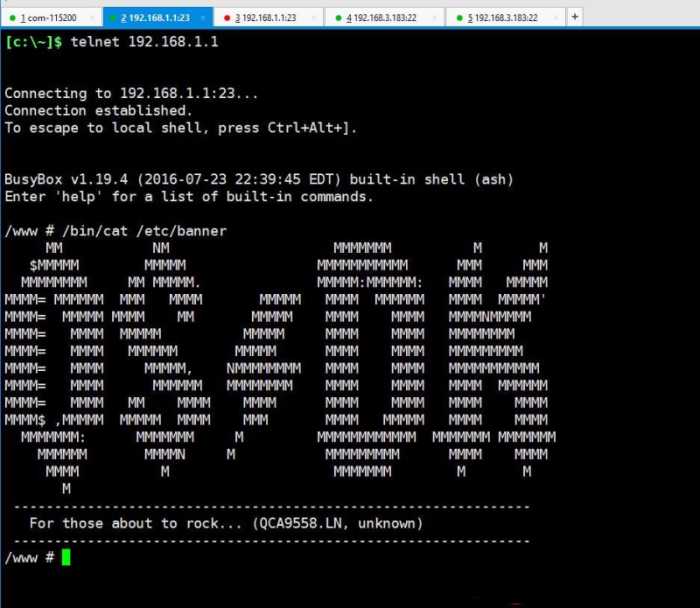
6:使用xshell或者你习惯的任何telnet工具即可连接。
7:注意事项:
此方式开启的telnet 很多命令需要加上路径才能使用比如ifconfig要使用/bin/ifconfig

总结:这里只是开启了telnet权限,之后我们会给到一篇刷机的教程,主要是刷openwrt固件,这样就完成的刷三方教程的全部方法了,当然上面的教程是刷机的第一步也是最关键的。