推荐内容
U盘三分区U盘启动盘手工部署方法教程
2017-10-17 来源:本站整理 作者:U盘量产网 浏览量:16835次
U盘如果直接分3个区实际上只能识别第一个分区,但如果是启动盘的话,就能识别3个区了,下面就教大家如何手动制作三分区双启动的U盘启动盘,需要用到几款工具,但都是常用软件,其实做起来并不困难,自己分区做的启动盘,干净,而且启动率更高,兼容bios和uefi启动,而且可以放入更多的winpe,更多的扩展工具,更多的维护软件等等。下面就开始操作,准备好工具和U盘。
1. 用FbinstTool格式化U盘创建低端UD隐藏区:
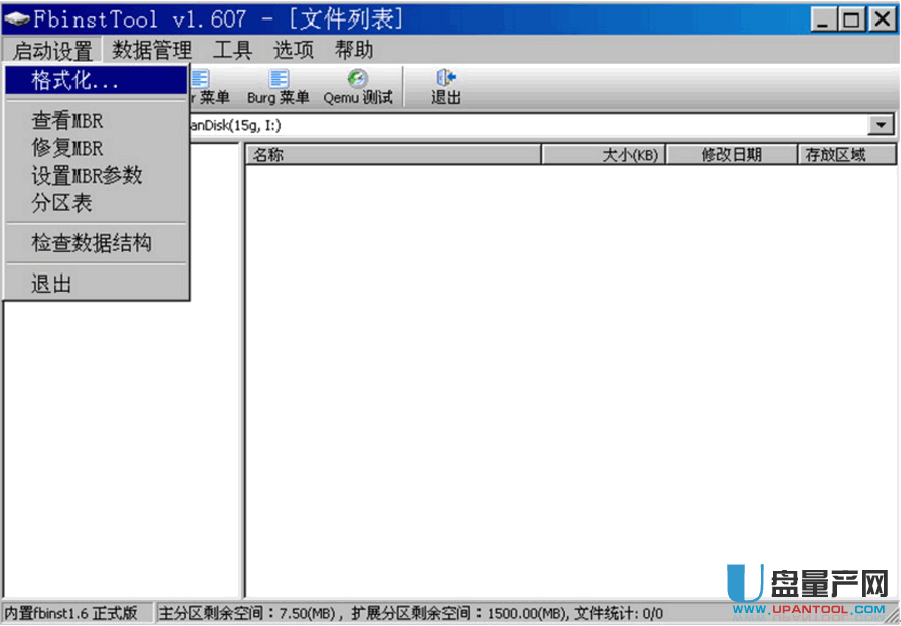
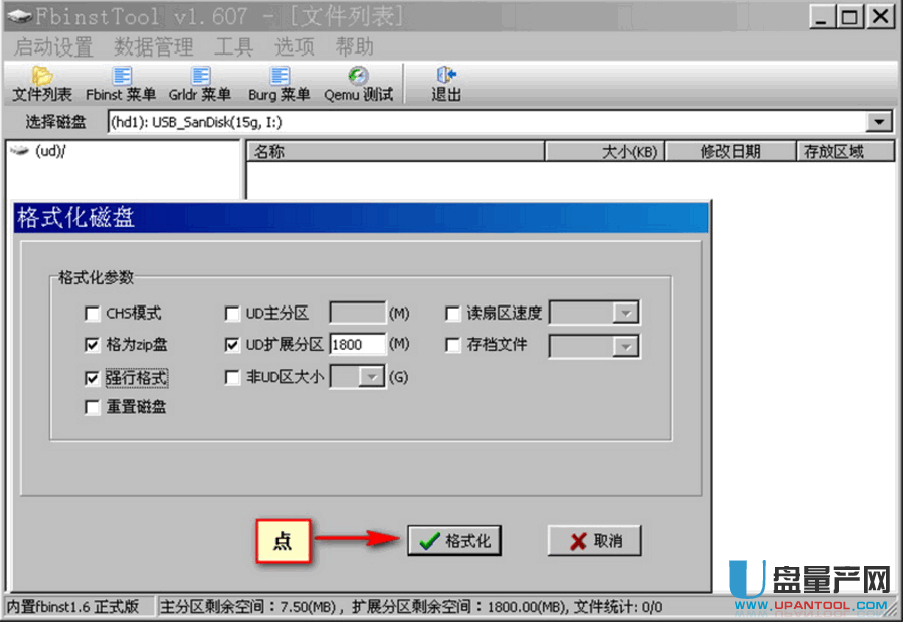
把U盘插入电脑,运行FbinstTool,选择U盘,点“启动设置”,点“格式化...”,
勾选“格为zip盘”, 勾选“强行格式”,勾选“UD扩展分区”并输入1800(这个数值是根据FBA文件大小确定的),
点“格式化”,是,是,等待格式化完成,点“确定”,退出FbinstTool。见下图:
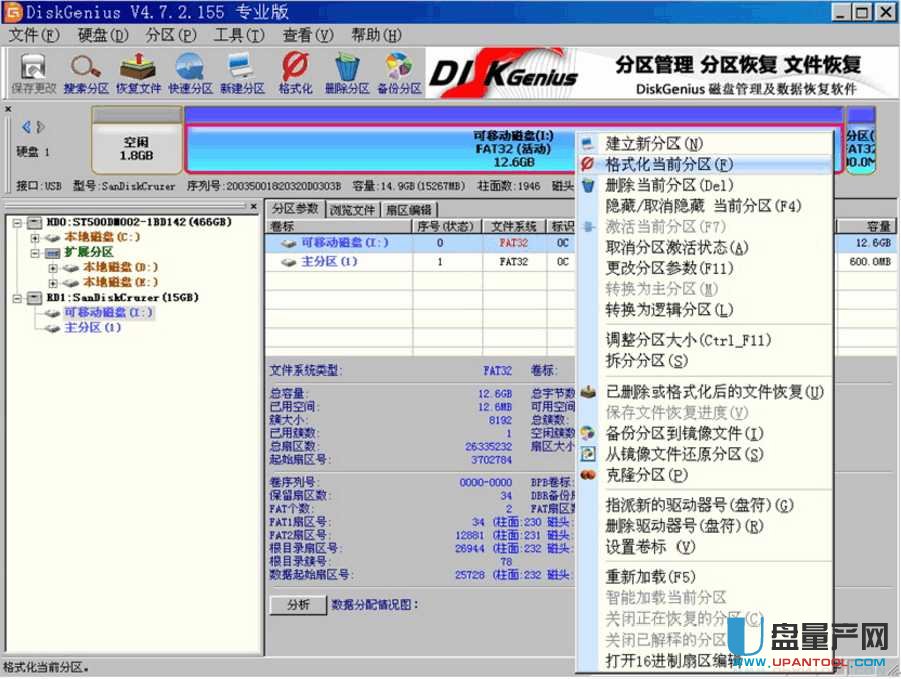
2. 用Disk.Genius拆分U盘可见区,分割出高端EFI区:
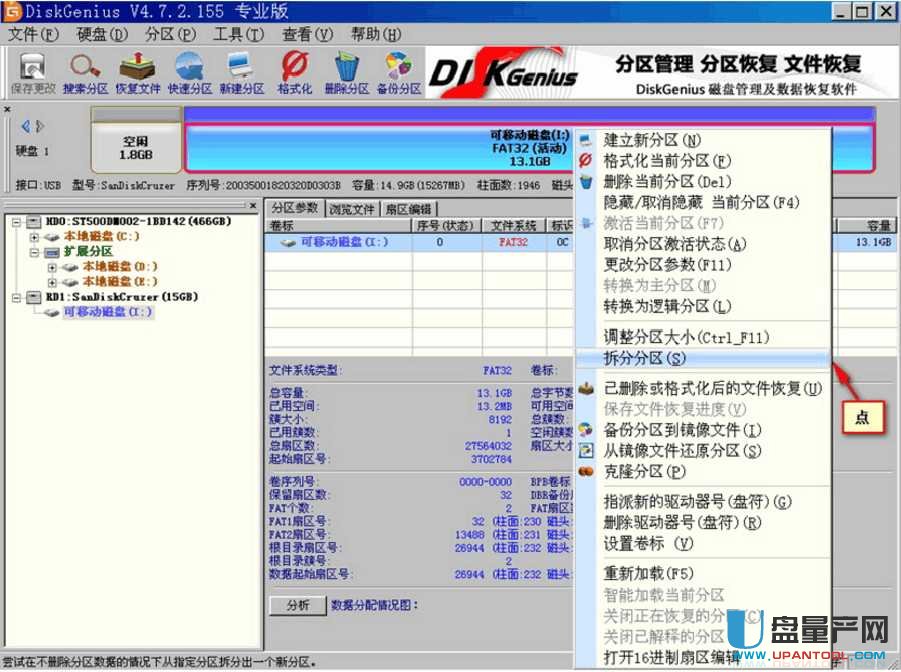
运行Disk.Genius,选择U盘,点选可见区,右键“拆分分区”,
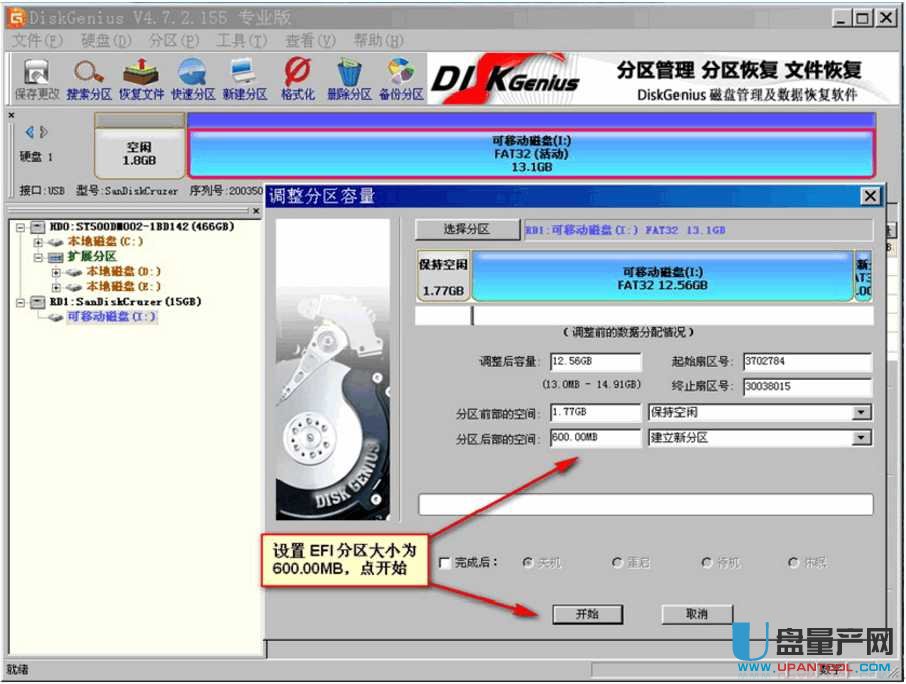
在“分区后部的空间”输入600.00MB(这个大小是根据EFI文件夹的大小确定的)- 建立新分区,
点“开始”,是,等待完成操作,点“完成”,高端EFI区创建完成。见下图:
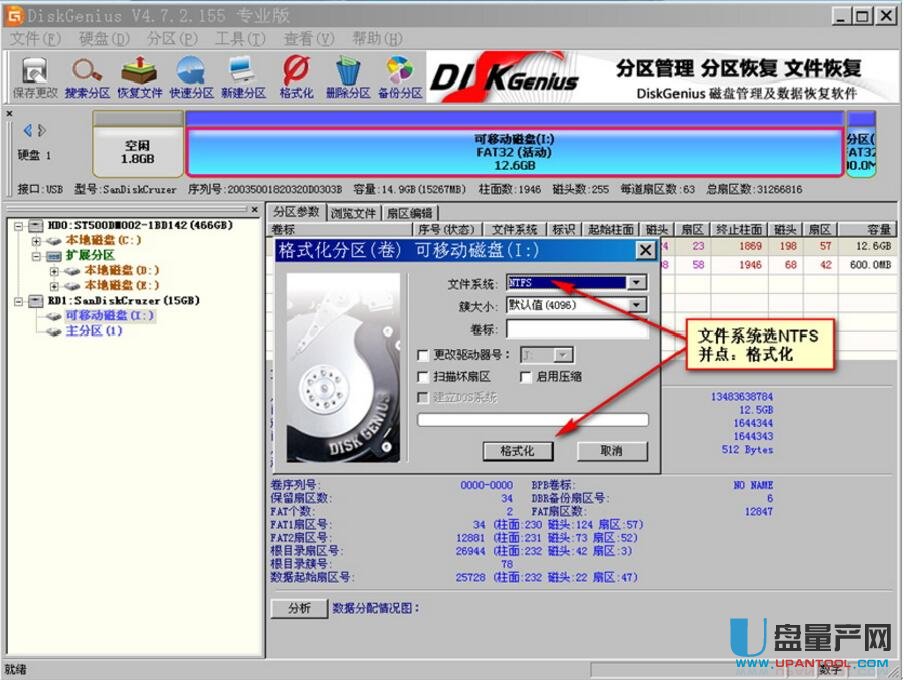
3. 数据可见分区格式化为NTFS分区:
点选中间的数据区,右键“格式化当前分区”,
文件系统选择NTFS,点“格式化”,是,等待格式化完成,退出Disk.Genius。见下图:
4. 把EFI文件夹复制到高端EFI区:
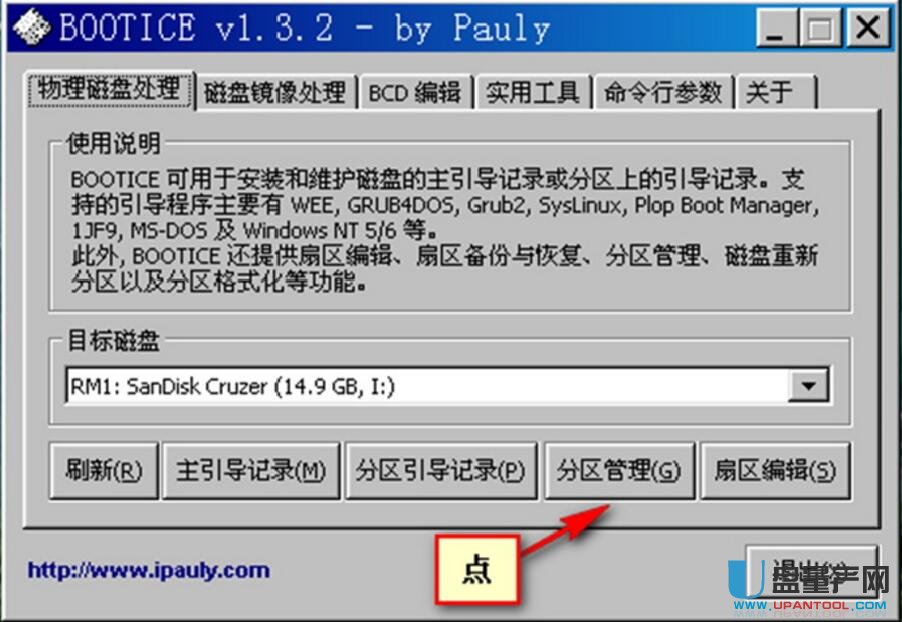
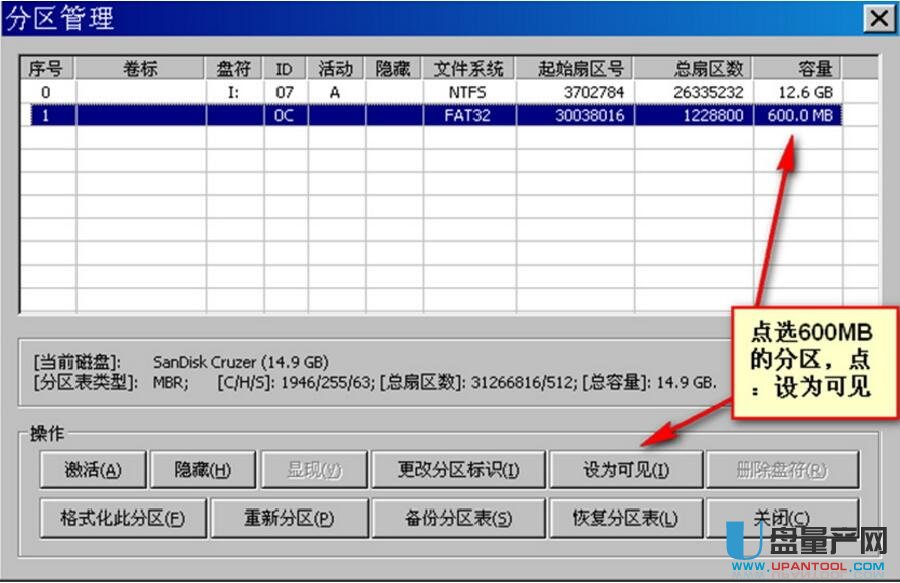
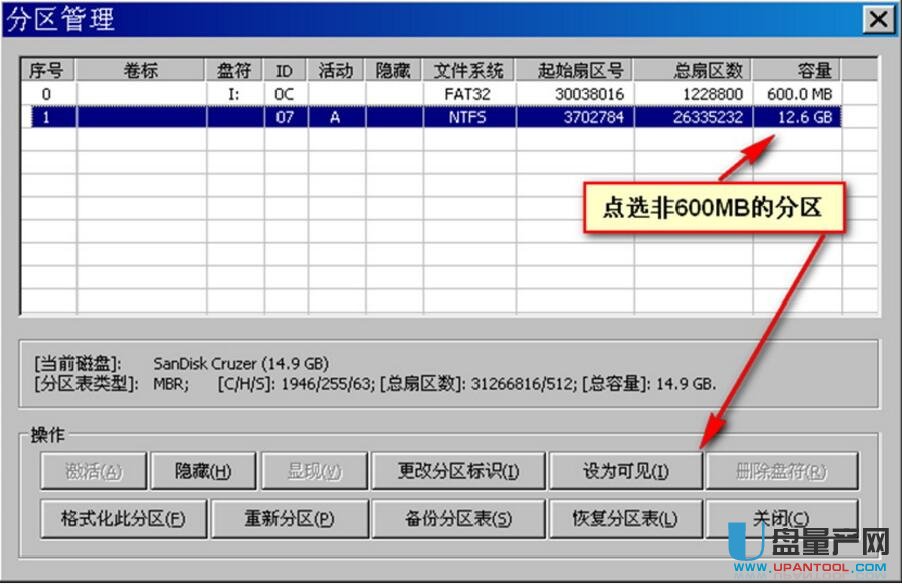
运行BOOTICE,“目标磁盘”选择U盘,点“分区管理”,
点选600MB的那个分区,点“设为可见”,在系统资源管理器中就可以对高端EFI分区进行文件传输,见下图:
打开我的电脑,找到刚设为可见的U盘分区,把EFI目录复制到U盘中,复制完成后关闭资源管理器窗口,
返回到BOOTICE“分区管理”页面。点选非600MB的分区,点“设为可见”,关闭并退出BOOTICE,见下图:

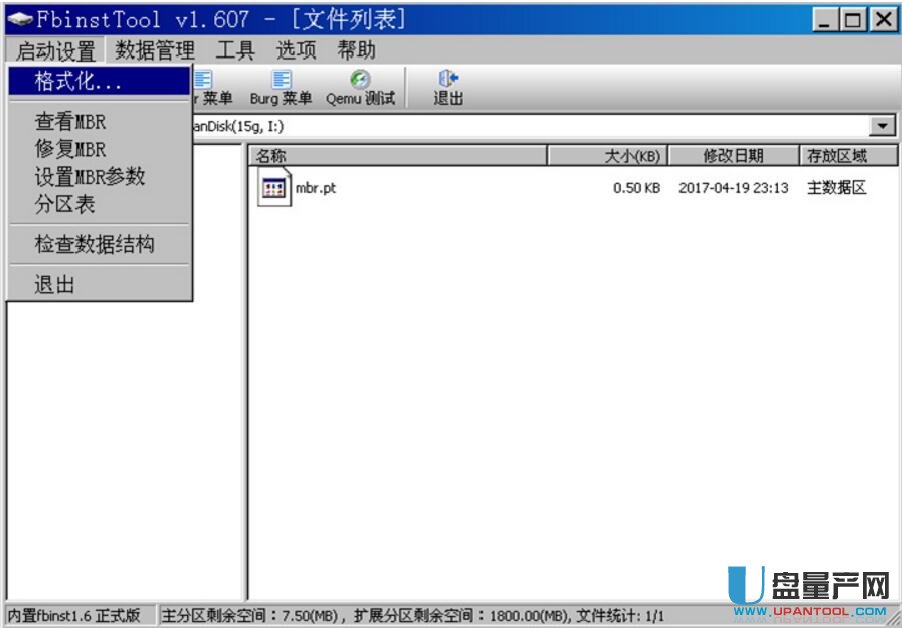
5. 把FBA文件写入低端UD区:
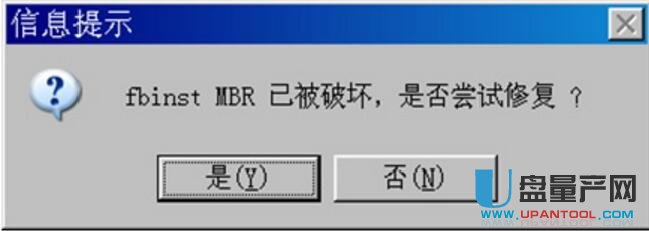
运行FbinstTool,若提示:fbinst MBR已被破坏,是否尝试修复?点“是”,确定。
点“启动设置”,点“格式化...”,见下图:
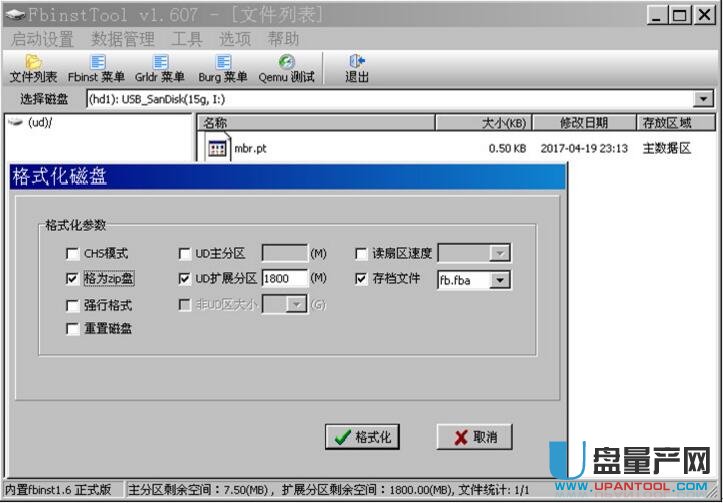
勾选“存档文件”并选择fb.fba,勾选“UD扩展分区”:1800,勾选“格为zip盘”(是否勾选这一项根据自己的需要,
ZIP格式能兼容老机,不勾选为HDD格式),点“格式化”,是,等待格式化完成,点“确定”,退出FbinstTool。
6. 把PETOOLS、DIY两个文件夹复制到U盘的可见区。
至此,完成三分区部署,三分区结构,见下图:
可以看到整个U盘分成了3个区
用到的工具分别是:
U盘三分区U盘启动盘手工部署方法教程手机版:https://m.upantool.com/jiaocheng/boot/11490.html
相关软件
相关文章